Editor’s Note: New post, October 2026. Steps checked October 13, 2026.
Research review: setup steps verified October 13, 2026 against FIDO Alliance guidance and current 2026 walkthroughs. No hands-on setup was done for this piece.
Key Takeaways
1. Turn on sync first (iCloud or Google Password Manager), so a lost phone is not a lockout.
2. Create your first passkey for your main email account. It protects everything else.
3. Keep your password and recovery options until you have signed in with the passkey once.
In a sentence: A passkey lets your phone or computer prove it is you with your face or fingerprint instead of a typed password, and setting one up takes about two minutes per account once sync is on.
Plain-English Verdict
Passkeys are the rare security upgrade that also makes life easier: no passwords to type, nothing for a fake login page to steal. Set them up in this order (sync first, email account second, everything else as it comes) and keep your old password as a backup until each passkey has worked once. That is the whole project, and it fits in one afternoon.
Here’s what a passkey does in one sentence: your device creates a matched pair of digital keys, keeps the secret half, and gives the website only the public half, so there is no password for anyone to leak, guess, or trick out of you.
Jargon Decoder
Phishing means a fake login page built to steal what you type. A passkey cannot be phished, because it only works on the real site it was made for. A lookalike page gets nothing. Synced means your passkeys are copied, encrypted, to your other devices through iCloud or Google, so a new phone inherits them.
Let’s do this together.
Step 1: Turn on sync before you create anything
This is the part everyone misses, and it is the difference between “passkeys are great” and a locked account.
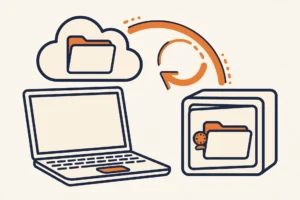
- iPhone or Mac: Settings, then your name, then iCloud, then Passwords and Keychain. Turn sync on. Your passkeys will live in the Passwords app.
- Android or Chrome: Make sure you are signed in to your Google Account with sync on. Your passkeys will live in Google Password Manager.
- Password manager users: 1Password and Bitwarden can also store passkeys, which helps if your house mixes Apple and Android.
Quick check: you should be able to open your password app and see your existing saved logins. If you can, sync is working.
Step 2: Make your first passkey for your email account
Start with email, because email resets everything else. For Google:
- Go to myaccount.google.com and sign in the normal way, one last time.
- Open Security, find “Passkeys and security keys,” and choose Create a passkey.
- Confirm with your fingerprint, face, or screen lock when your device asks.
That’s it. You are done with the hard part. For a Microsoft account, the same idea lives at account.microsoft.com/security, under “Manage how I sign in,” then “Add a new way to sign in or verify,” then “Face, fingerprint, PIN, or security key” (via PCWorld’s walkthrough).
One honest Apple note: there is no single passkey for your Apple account to create. On Apple devices you create passkeys inside each site or app, and they save to iCloud automatically. Step 3 is where Apple users do the same job.
Step 3: Add passkeys account by account
There is no bulk button, and that is fine. Whenever a site offers a passkey (look in its security settings, often labeled Passkey or Sign-in options), say yes, confirm with your face or fingerprint, and move on. Banks, shopping, and social accounts are all adding the option through 2026. Signing in on a computer that does not hold the passkey? The site will show a QR code. Scan it with your phone and confirm. Your phone and computer check they are near each other, and you are in.
Step 4: Test once, then keep your backup
Sign out of your email and back in with the passkey before you trust it. Then leave your password and recovery options in place. A passkey replaces typing your password day to day. It does not require burning the backup bridge behind you, and for your most important accounts, a passkey on a second device is the backup worth having.
Prompt Station: Paste this into ChatGPT or Claude: “Make me a passkey setup checklist in this order: turn on sync, protect my main email first, then my bank, shopping, and social accounts. For each step, tell me what menu name to look for and how I will know it worked. Never ask me for any password or code.” Open in ChatGPT · Open in Claude
Keep reading
- How to Set Up a Password Manager in One Afternoon: the natural partner project, for the accounts that do not offer passkeys yet.
- What Is Two-Factor Authentication?: the second-lock idea passkeys grew out of, explained plainly.
Method: Research review (no hands-on testing). Steps cross-checked against FIDO Alliance passkey guidance, 2026 setup walkthroughs for Google, Apple, and Microsoft accounts, and PCWorld’s Microsoft passkey guide. Checked October 13, 2026.
Corrections: Spotted an error? Tell us. We fix mistakes publicly and date them.
Source: The FIDO Alliance’s passkey guide (via FIDO Alliance), checked October 13, 2026.
Like plain-English tool guides? Our newsletter rounds up the week’s posts every Saturday. Join here.